Book binding tips, tricks, advice and secrets
I love what’s possible in digital design and production, but the truth is there’s something that digital products lack when compared with print.
This missing quality is tactility, the effect of touch and physical behaviour as a part of the overall experience. Even in print this is all too often forgotten as a part of the overall design process, or at least relegated to a quick decision at the start of a project.
Bret Victor’s November 2011 post on his ‘future of interaction design’ blog is well known as the “pictures under glass” argument. While he goes off on a bit of a rant and misses a number of important aspects, he does have a point. There’s no way for a digital publication to deliver the same physical experience as something printed, for instance, on a textured or soft-surfaced material, such as flocked ‘velvet’ paper. Or demonstrate the clear difference between a hardback and paperback book. Or the delicate fragility of bible paper vs. the rigidity of a dense card stock.
Even binding, how a stack of pages are held together, is something that gives the final product part of its overall impact and helps determine how the end user feels about it. This is a key part of both the visual and the directly interactive aspects of print. Don’t believe me? Then take a look at the various different kinds of binding that can be used when producing a multiple-page document.


In commercial production – and in hand-made book binding too – the pages are generally gathered together in signatures, a process that’s based on commercial print production processes. Signatures are folded sets of pages, the result of printing multiple pages on a single large sheet before folding and trimming, leaving one edge uncut. The sheets in a signature can be sewn together or ‘saddlestitched’. This means stapled, but for God’s sake don’t call it that! It tells a printer or binder that you’re clueless, which is never a good basis for negotiation. Wire-stitched is the general term for stapled, and saddlestitched is when the whole thing – covers and contents – is stapled through the spine. You’ll see this used in thinner magazines, generally not anything with more than around 64 pages. (Why 64? Because most pages are fitted eight-up per side, sixteen pages in total, on the paper that goes through the press. Each one of these is a section, and four sections would equal 64 pages, typically plus cover.)
If you read this in the original printed issue of MacUser magazine then what you held was ‘perfect bound’, a curiously upbeat term for glue-based binding. Pages are either trimmed to individual sheets or collated into stitched section signatures and held together with hot glue along one edge. Paperback books as well as magazines are typically trimmed down to stacks of single sheets before the glue is applied. It isn’t really perfect; in older books the glue can start to crack and drop pages. It also doesn’t let publications open as flat as other kinds of binding. Despite the possible problems it is popular… because it is a cheap and quick process well suited to mass production.
Case binding takes prepared signatures, sews them all to each other along their bound edges, then glues them to the cover – the ‘binder’s boards’ and endpapers – to produce the final hardback result. It’s a fun process if you do it by hand (I sat in with some of my students on bookbinding sessions a couple of years ago) and it is the basic method for the majority of high-quality books. Tape binding is a variation on this: pretty much as above but with a cloth strip glued to the spine, sometimes as a strengthening step for perfect binding rather than stitching. Case is optional.
Wire-o, spiral and comb binding are all really versions of the same thing. These use plastic or wire threaded through row of punched holes. Simple, although there are more styles than you might guess. One Wire-O variant is called Canadian, where the loops go through one side of a card cover (half-Canadian) or both the front and back.
A much more interesting binding technique if you’re making something yourself is the French Fold. In short, this is done by folding sheets of paper in half, then binding the open edges rather than the fold. Each page is actually a loop rather than a simple sheet. Printing just needs to be done on one side of the paper, which makes it easier to produce from ordinary desktop printers; just choose the two-up option from the Layout section of any standard print dialog. It does bulk out the final product a bit because you’re using twice as many sheets as an ordinary double-sided set of pages, but it is highly distinctive. If you want to try it yourself then follow these steps.
Printing and folding
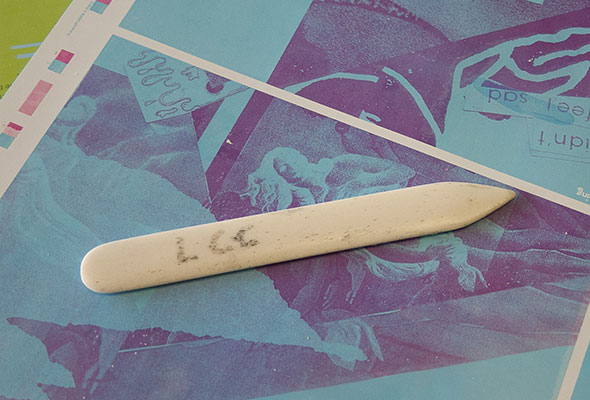
Print your pages two-up on a page, then fold each sheet in half. Accurate folding is the key. Book binders do this with a bone folder – a device for folding and creasing, not the kind of folder that stores things. This gives a clean, consistent crease to the folded edge, but you can use a thumbnail in a pinch.
Aligning
When you’ve done your set of pages (and checked that they’re all the right way around) you need to knock them up to the fore-edge, the part furthest away from the spine. This makes them all aligned at what will be the open end of the book. Unless you’ve folded each sheet with unhuman precision the back edges will be slightly ratty and uneven, so trimming that is the next task.
Trimming
Press the set of pages down and hold a steel ruler along the edges opposite the fold. You’ll need a scalpel for this, or a very sharp craft knife, and some patience. Cut gently and repeatedly, don’t try to press through too quickly or you’ll distort the edge.
Glue binding

Clamp the pages, sandwiched between a couple of bits of stiff card, leaving maybe an inch of the newly-cut spine edge standing free. Now push this sideways to fan the pages a little and apply PVA glue. Push the spine the other way and repeat, then squeeze the sheets together and see if you need to touch up the glue anywhere. Clamp the whole thing or put it under a heavy weight for at least an hour, but preferably overnight.
Stitched binding
Alternatively, for thinner productions, there’s the ‘Singer-Sewn’ method of binding, where the pages are stitched together right through the stack next to the spine and the thread is left visible. Tackling more than a few sheets is hard work. Taking the technique’s name at face value isn’t a bad idea: an old Singer sewing machine (or any brand, really) with a tough needle, thick thread, and set to a wide stitch can work well. Honest. Although watch your fingers, try to stick to 3mm or less thickness, and don’t blame me if you break the sewing machine!
Cover
The final step is adding a cover, soft or hardback. Rather than have me go on about this you should head to this useful online tutorial from the University of Iowa. There is more there about the rest of the process too, in case you want more detailed explanations.
You can use this to make one-off books for presenting work if you want to make a certain kind of ‘creative craft’ impression. You can also do this to make your own sketchbook or notebook. It’ll take hours to do, so I’ll understand if you prefer to buy a regular one down at the local stationers. But it is always a good idea to try this sort of thing. And while it doesn’t really matter it is definitely more creative-cool to use your own custom-made sketchbook.


