How can you print without using ink, without applying some kind of colour to a surface?
There are two processes that come to mind: embossing and die-cutting. They’re not generally options we get to play with as a rule, but that’s no reason not to look into the possibilities.
 Embossing can be done with print or without. When it’s done alongside print that’s generally called colour or colour register embossing. Without ink it’s known as ‘blind embossing’, visible only through the shadows made by the embossed edges. Embossing paper is normally done with two-part presses, one pushing the paper into recesses in the other, with heat and moisture helping reshape rather than cut or tear the paper fibers. It’s run separately from actual print as a different workflow, even if the emboss design is made to work directly with print elements, so there can be a significant cost. Talk to your printer before making any commitments. What’s attractive about embossing is the tactile element this adds. A well-considered emboss (or deboss, where the paper is pushed down rather than up) takes a design from being purely visual and two-dimensional dimensional to having a surface with built-in edges. This could enhance something that’s part of the print design or add a completely new layer of information to the work.
Embossing isn’t just a decorative process. It is one of the methods used to produce braille, and it’s also used to add texture to paper towels and tissue, making them more effective. As long as the embossing doesn’t seal the fibers so the paper doesn’t absorb things well, I guess.
Die-cutting is another non-print ‘printing’ process. This is used to cut custom shapes in all sorts of materials, from leather to cardboard. With paper it’s normally done in conjunction with the regular print process, using flatbed or rotary die presses. Metal blades are made up to the cutter design, then pressed into the material to cut it. With some cutter production methods the detail can be quite fine, but watch out for material strength; thin paper strands will tear at the first opportunity. If you want to make one-off or short-run work a laser cutter may be more appropriate, but for long runs you’ll need to grit your teeth and factor in the cost of the die makeup and the print finishing work.
If you can’t use embossing or die-cutting in a design there are ways to fake it. It won’t be the same, but if the budget or material doesn’t allow it you may be able to simulate embossing with simulated shadows in regular print. It’s not all that easy to make it look convincing – watch out for the cheese factor – but it’s doable.
One quick-fix method is to use Photoshop’s Emboss filter. Start with the shape to be embossed; imported from an Illustrator graphic or drawn in Photoshop, it doesn’t matter which as long as the resulting Photoshop document resolution is suitable for print.
Make sure the shape is on its own layer, and fill the shape with a neutral tone; grey, black or white, just as long as it has no colour at all. Choose Filter > Stylize > Emboss and tweak the settings. Consider setting the angle to 90 degrees to simulate light falling straight down. (Why practically every light-based effect starts at 135 degrees I don’t know! The Mac OS X window shadow direction shows the effectiveness of the straight-down approach, but all the shadow or emboss effects in graphic applications seem to start with the light source at the upper-left.)
The emboss height depends on the resolution of the image as it’ll be used in your layout. At 300ppi, a ten-pixel height will be around 1/32 of an inch, or roughly 1mm. I’m fudging massively here, but it’s important to get a sense of how large the emboss edge effect will be in the final print. Judging this purely from the on-screen appearance in Photoshop is not a great idea.
Once the emboss effect is done, use the Magic Wand tool set to a very low tolerance level, select the main inner area, and delete it. What’s left should be just the embossed edges, nothing else visible at all. Set the layer opacity to 20 or 30% then import it into your layout in InDesign or QuarkXPress and see how it looks. (You can set the opacity in both DTP applications, but in my PDF output tests the InDesign version completely disappears if it’s anything less than 100%.)
Yes, I know InDesign has a nicely configurable Emboss effect, but I have a few issues with this. First, the quality of the emboss is low, and it takes fiddling about to improve this. Second, if the object has no fill, the effect disappears. If the emboss effect sits across other page elements this can be a problem. Finally, again when placed over other items, these in-house effects tend to render imperfectly with standard output settings. But here’s a trick: if you’ve drawn the right shape in InDesign, simply remove the emboss effect and copy and paste it into a Photoshop document. Scale it to a decent resolution, render it to pixels (it’ll be a Smart Object at first), and do the emboss process we covered earlier. You’ll still be dealing with imported images in your final page layout but you don’t have to redraw a custom shape from scratch.
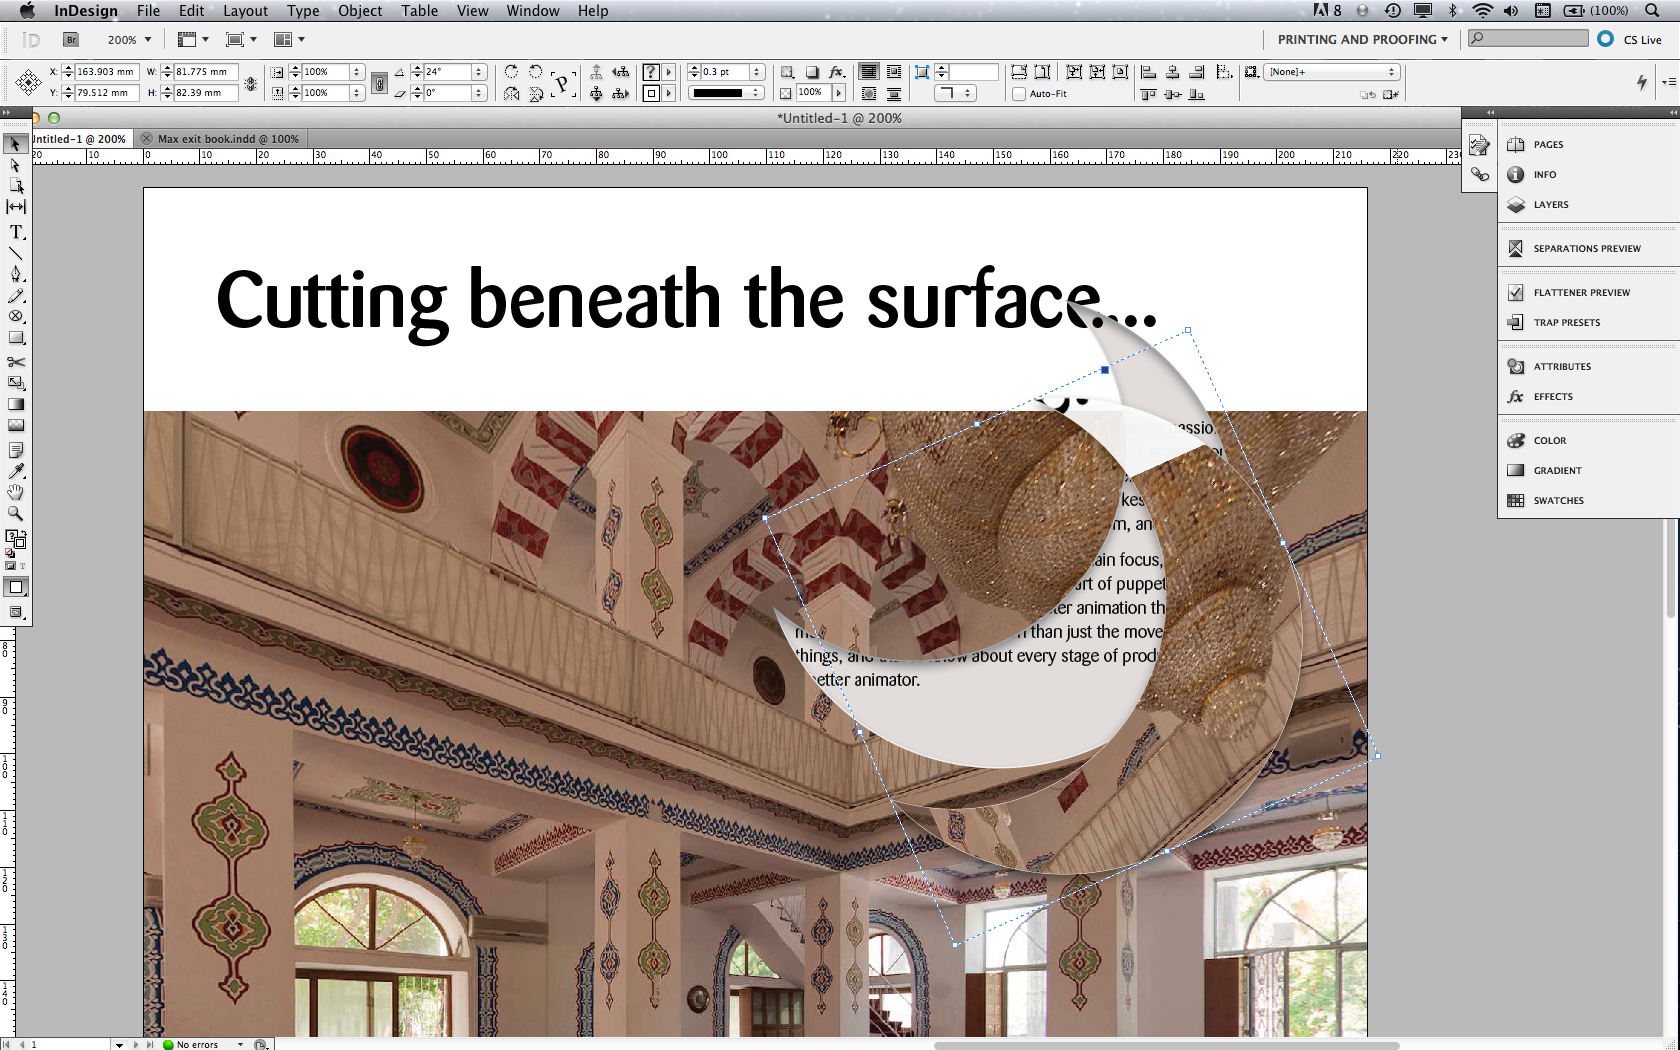
Making a die-cut effect – a fake one – takes a little more ingenuity, and you need more than one page to play with. It is also easy to make this look really corny, so be self-critical about the results and be ready to can it if you’re not totally satisfied. As we’ve done here, you need to have the layout of the underlying page finished before you attempt this. Export that layout as a PDF, draw your cutout shape on the previour or next page (this depends whether you’re doing it on a right or left page in the spread), and import the PDF as a picture into the shape. Make sure it is scaled to the same size as the original layout and move it around so the page image sits squarely on the actual page – that way the visible part will be in register with the original layout on the other page.
The touch that makes this feel more visually convincing, and something that can also blow the trompe-l’œil thing entirely if done crudely, is to give a slight drop shadow to the inside of the cutout shape, as if the ‘front’ page is lifted slightly up from what seems to be seen through the fake hole. InDesign users just need to choose Object > Effects > Inner Shadow and play with the settings. Try 90 degrees angle, 1mm size, and reduced opacity to start with. QuarkXPress doesn’t have this as a canned effect, so a workaround is needed. One method is to fill the cutout shape with a solid colour, export the page as a PDF, open that in Photoshop, then magic wand-select the shape area, copy to a new document, and make a blurred shadow from that. Save, import into a duplicate cutout shape, nudge the image down a little to get the offset, and you’re done. Perhaps we’ll get more visual effects in future; this workaround does the job but it is definitely fiddly.
