Get hands-on with paper
 Graphic design processes are almost always about putting marks on surfaces, and those surfaces are almost always paper. We take this medium for granted, but do we really know much about it? We talk about ‘dead tree publishing’, reject the paperless office concept by consuming tons of the stuff, recycle it (probably not as much as we should, but some at least)… and rarely give it any other thought. But considering that the wrong paper choice for a print project can spoil the design’s impact and worse, it is worth putting a little time aside to learn a bit more about paper.
Other than crude photocopy and laserprint paper, the kind most of us deal with directly is regular inkjet stock. Inkjet paper is a particularly complex thing, thanks to the need to take a high level of liquid from the printer, hold the colour (pigment or dye) at the surface while wicking away and holding the moisture, yet not pass this through to the fibres of the substrate – the base paper itself. This is done using multiple layers of different compositions, from the laminated paper fiber base through to some kind of porous or fusable top coating. The result is a stiff, expensive paper that does the inkjet print job well but isn’t suitable for normal commercial print use at all.
Once you start digging into the background of paper manufacturing you quickly find that there’s a staggering amount to know, much of it highly technical and often based deeply in chemistry and physics. For example, other than wood, the key material used in most paper-making processes today, both coated and uncoated, is calcium carbonate – or CaCO3 if you want the formal designation. Paper manufacturers even worry about the shapes of the particles produced by the common precipitation process; scalenohedral, rhombohedral, or sometimes acicular. The mind boggles.
There are also weird facts that crop up in this field. For example, until recently, most coated paper for commercial printing – not inkjet paper stock – was produced using kaolin (dioctahedral phyllosilicate clay or Al2Si2O5(OH)4, if you want to impress a chemist), which is formed from the weathering of feldspars and nephelite (so now paper-making encompasses geology). It is a good filler for paper-making, being opaque white and having a low ‘shrink-swell capacity’, in other words a good physical stability in varying humidity. Sure, none of this is weird. Geeky perhaps, but not weird. What is odd, though, is that kaolin often contains trace quantities of uranium and thorium – so now we’re taking in nuclear physics as well!
The radioactivity levels in a magazine’s worth of kaolin-coated paper are miniscule, but take a truck-load of this kind of paper stock and you might actually tickle a sensitive geiger-counter, or so the studies at Oak Ridge Associated Universities concluded; see bit.ly/radioactivepaper for the details. But don’t worry, kaolin is all but discontinued in commercial paper making; the only risk your copy of MacUser (or any other magazine) might pose to you is through paper cuts.
The reason kaolin has been pretty much phased out isn’t because of this trace radiation, it is more because of the need for balancing the Ph (acid/alkaline) levels of paper. If you’ve ever looked at paper meant for artists you’ll have seen ‘acid-free’ proudly proclaimed. This is an important factor in paper durability. For centuries, normal paper-making processes have used chemicals and materials that have left the finished product with a slightly acidic Ph balance. You can see the results in books, magazines and especially newspapers that are a couple of decades or more old; the paper starts to turn yellow and becomes brittle, almost as if it is being slowly toasted. In fact, in the field of library science this degeneration is called the ‘slow fire’ problem, and it is a serious threat to print archives. De-acidification processes help, but they are slow and costly. Mass scanning is another option, but what format and storage medium should be used to ensure the data is readable in twenty, fifty or a hundred years from now? Paper might age over a number of decades, but how confident are you about reading a digital document you saved just ten years ago? No, for all its failings and production complexities, paper is still fundamentally important.
If we’re honest with ourselves the majority of the design work you or I do isn’t meant to last that long. Business cards and advertisements are ephemera, stuff that’s not meant to be preserved for posterity. But if we look back at comparable things from, say, the mid-20th century we find a mine of odd and inspirational print. The John Johnson Collection in the Bodleian Library in Oxford University is an archive of just this sort of thing; printed ephemera ranging from the early 20th century back to 1508. The site at bodley.ox.ac.uk/johnson/ has information, although for access you have to use library services or travel to Oxford yourself. If that’s a bit too much effort then browse the posts at johnjohnson.wordpress.com instead. Today’s throwaway designs might be tomorrow’s design history – perhaps. So choose the paper wisely.
What now? Well, if you’re feeling adventurous you could try your hand at making your own paper. Not for a print run or anything that ambitious, but it is a good way to develop a deeper appreciation for paper – especially the more exotic kinds.
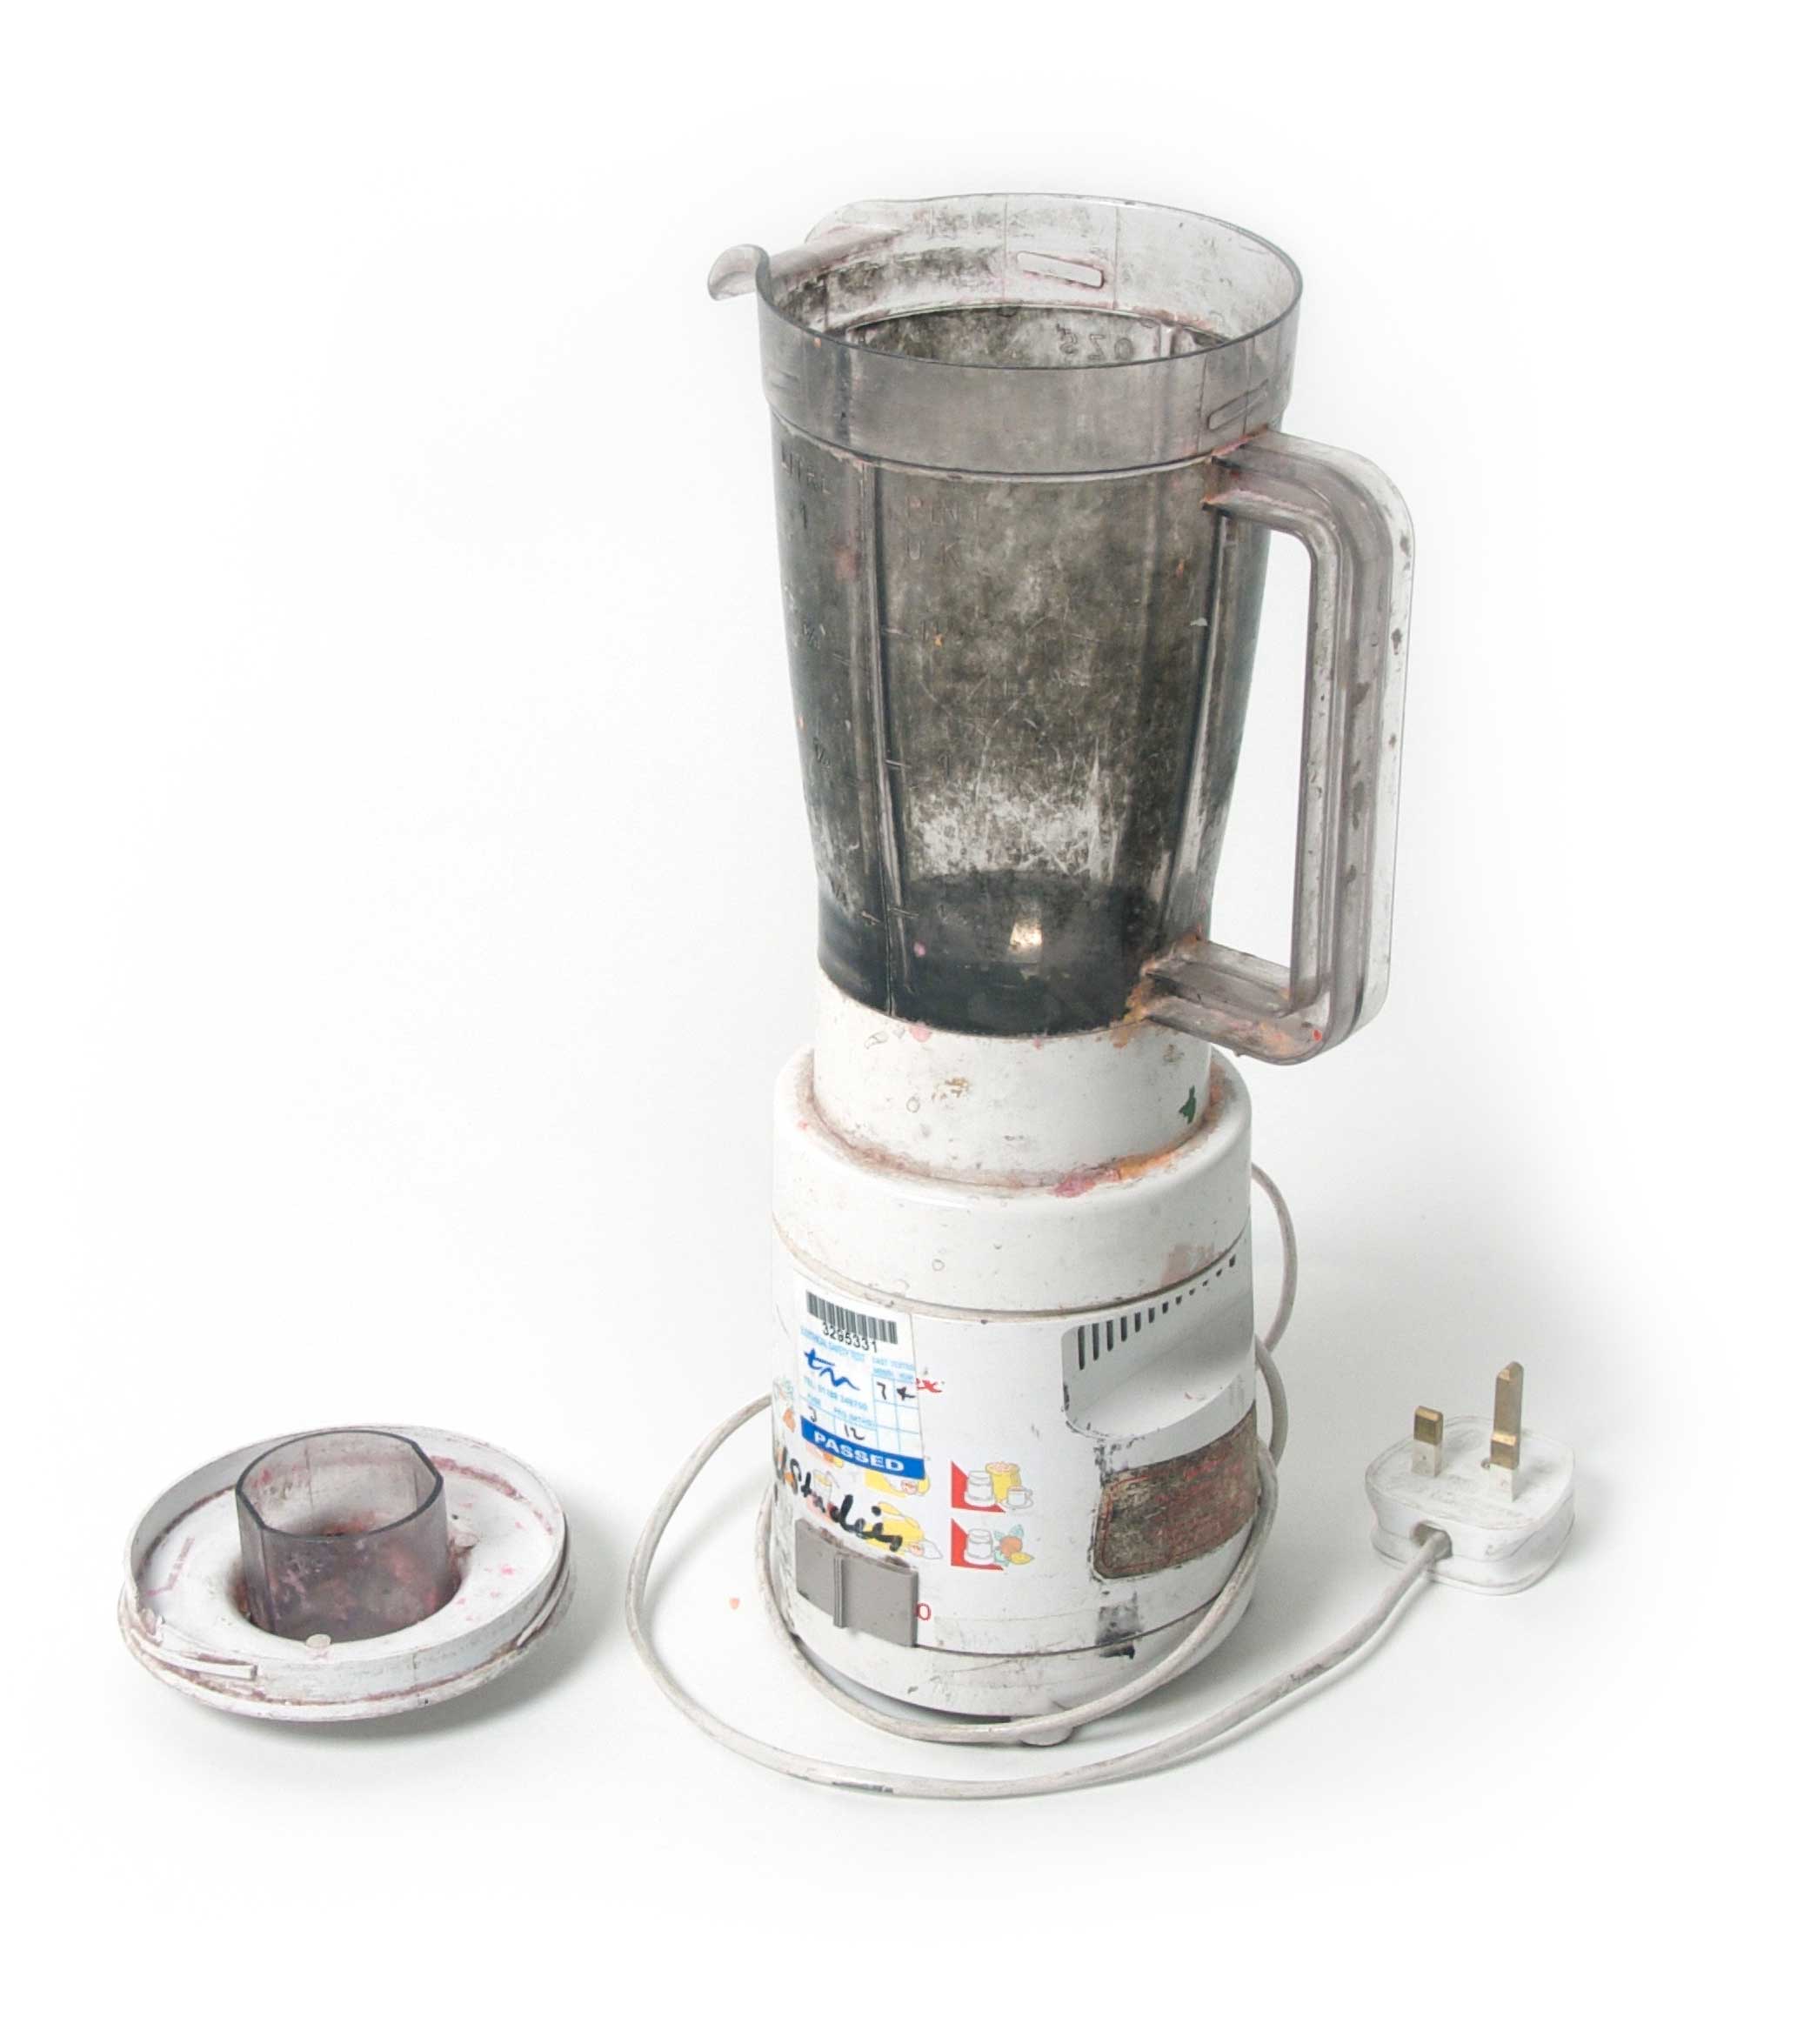
Get a food processor. A cheap one is best, but don’t try those hand-held blenders. (Note: this won’t ruin it, but it’ll need a thorough clean afterwards.) You’ll also need a couple of small picture frames, with a fairly fine mesh fastened across one, and a sink or deep tray big enough to accommodate the frame when held flat. Finally, find an old kitchen towel, newspapers, and a place for storing and drying your paper.
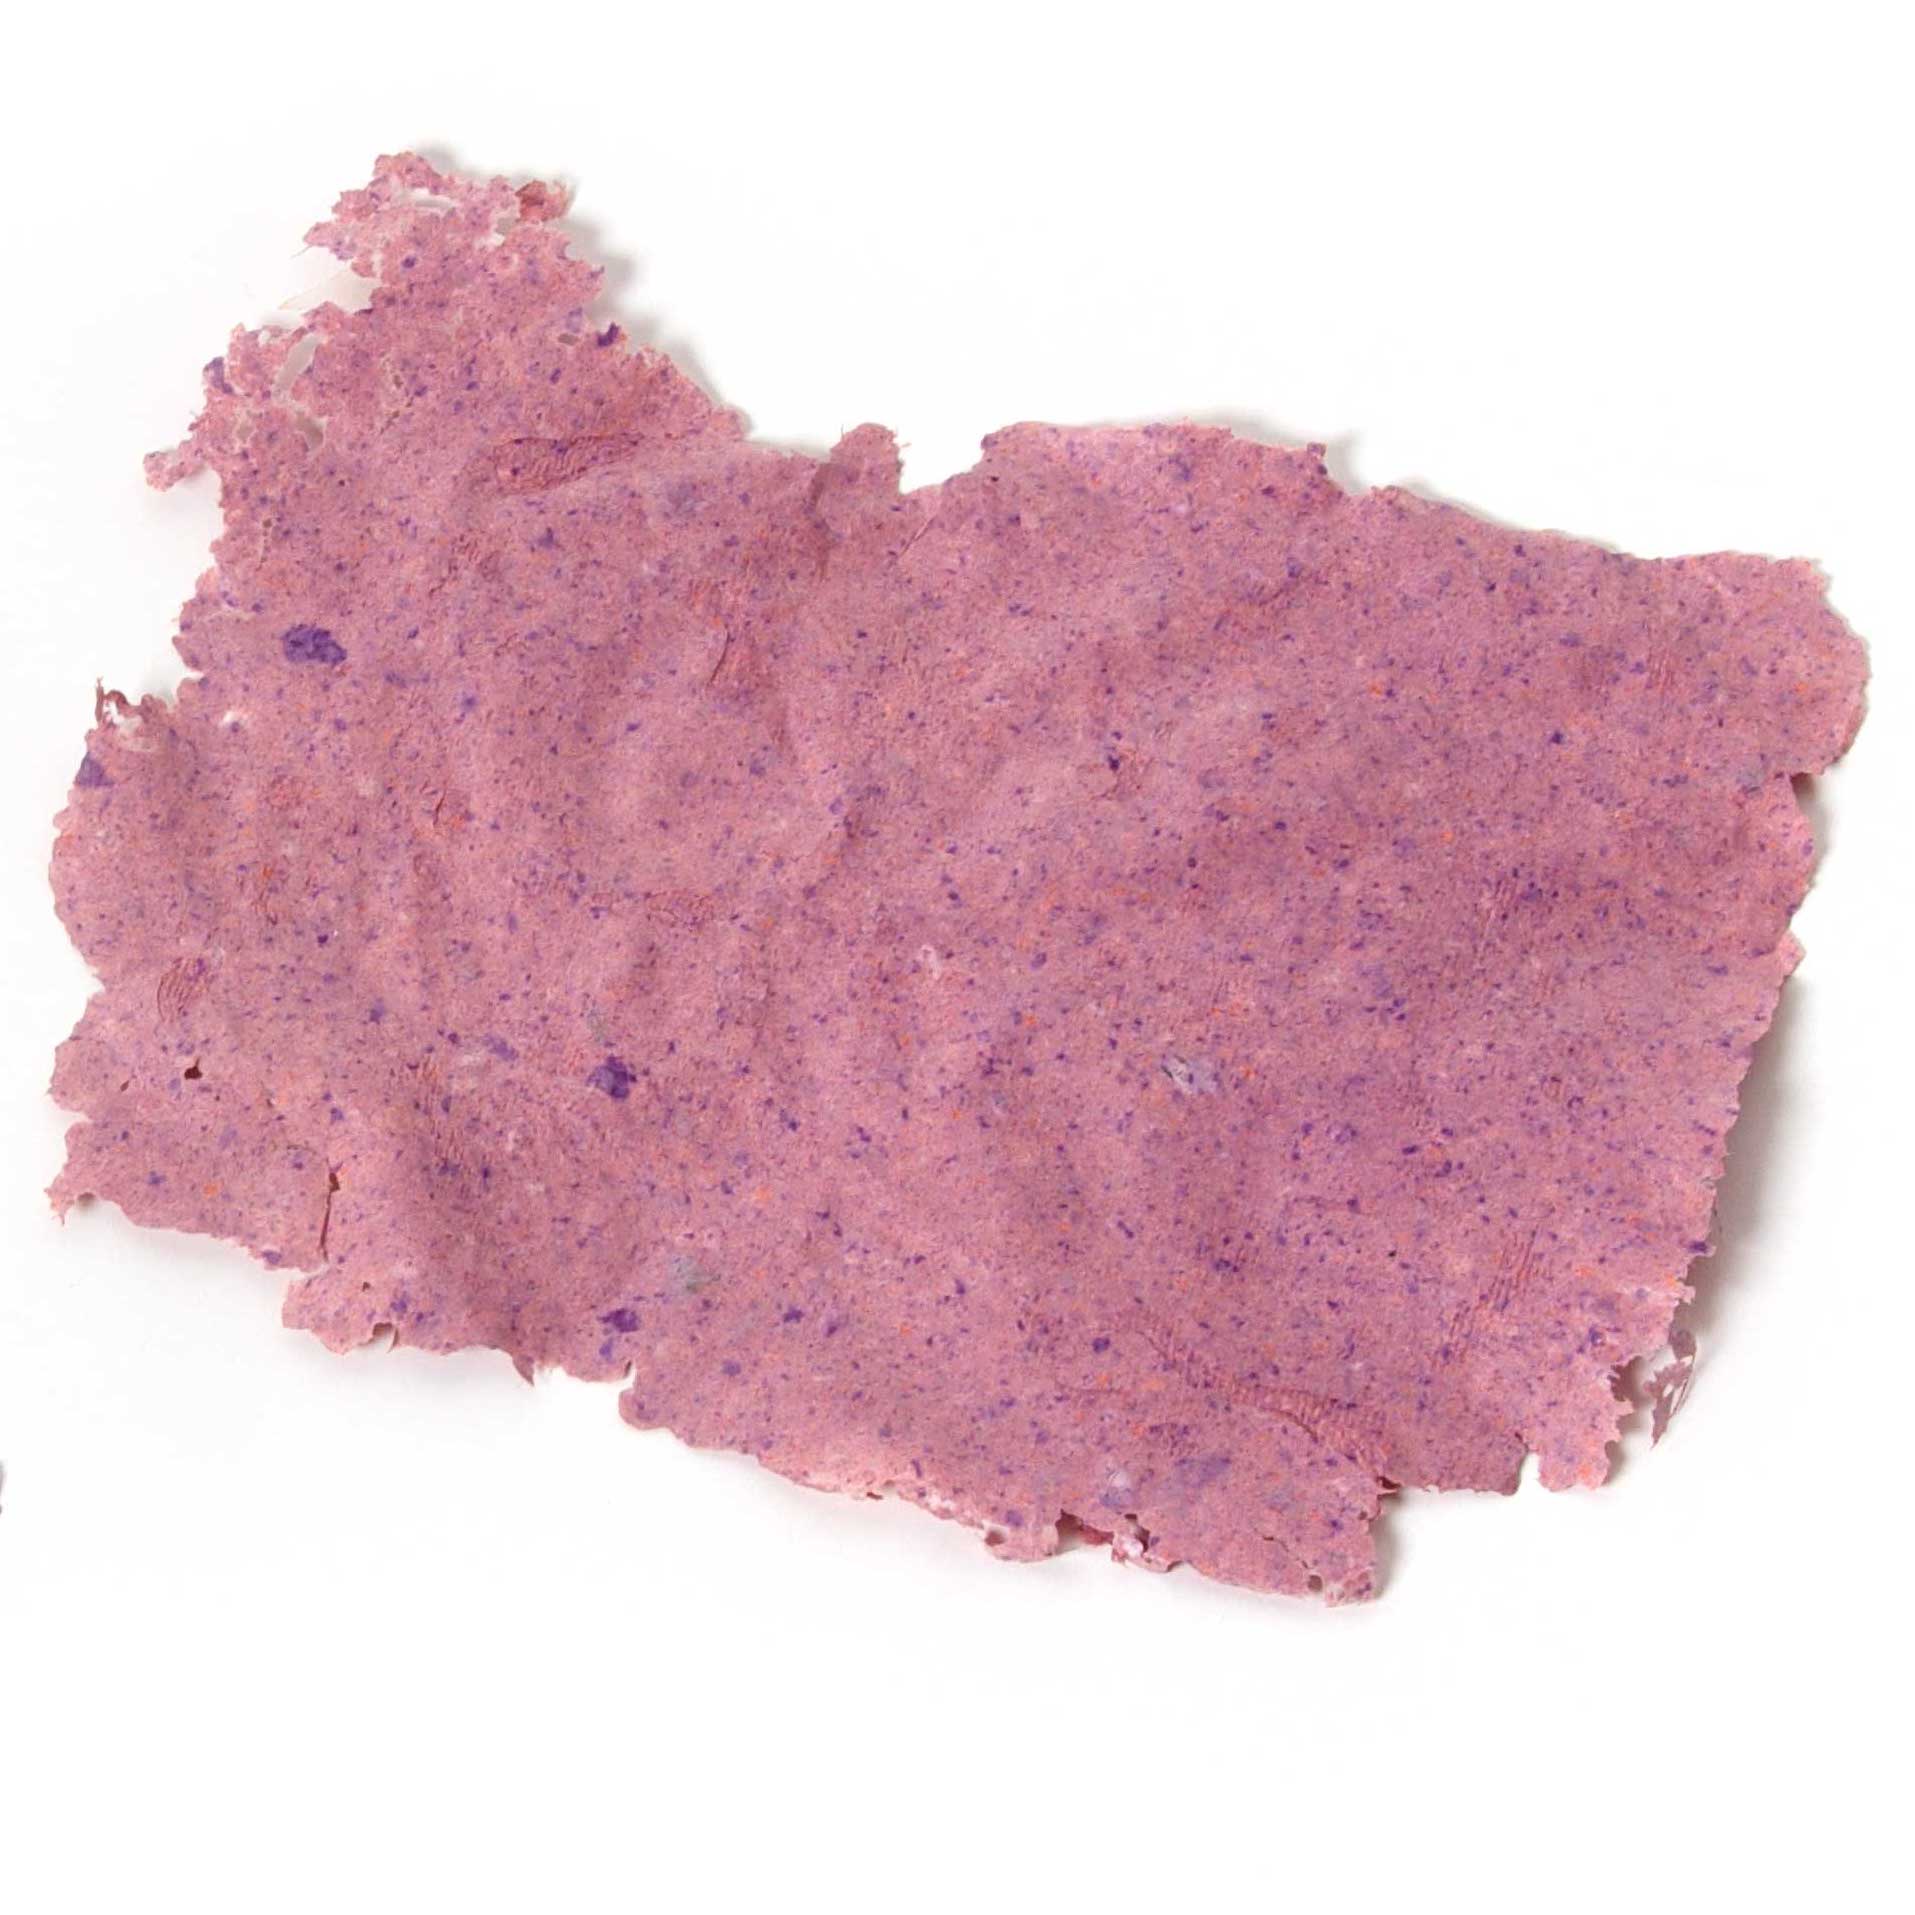
Now get some tissue paper (this blends the fastest); a dozen or so A4 sheets should do it. Tear it into small bits an inch or so across, put it into the blender jug, and top up with freshly-boiled water. Blend this for a minute or so until the paper is a liquid mass. Or mess, if the lid wasn’t on properly.

Put some water into your tray then add your liquified paper into it to make a very thin mix. If you want to add anything more – dye, glitter, coloured threads, dried leaves or flowers and so on – do this now. Stir, then put the two frames together, empty one on top. Slip them down into the tray and gently scoop them up again, held horizontally to distribute the pulp mixture evenly. Drain for a minute or two, then remove the top frame and flip the whole thing over, pancake-style, onto the kitchen towel and newspapers. Sponge up the moisture with kitchel roll or a sponge until the mesh starts to lift off, then lift the frame away. Leave it overnight then press between heavy books or boards for another day or so and yes, you’ve made paper. True, made it from existing paper that’s been pulped and reconstituted, but this is basically what recycling does anyway. Oh, don’t pour away the spare pulp or your drain might clog up. Drain it out and recycle it, or make more paper. If you want to go over this in a little more detail there are instructions at bit.ly/handmadepaper.
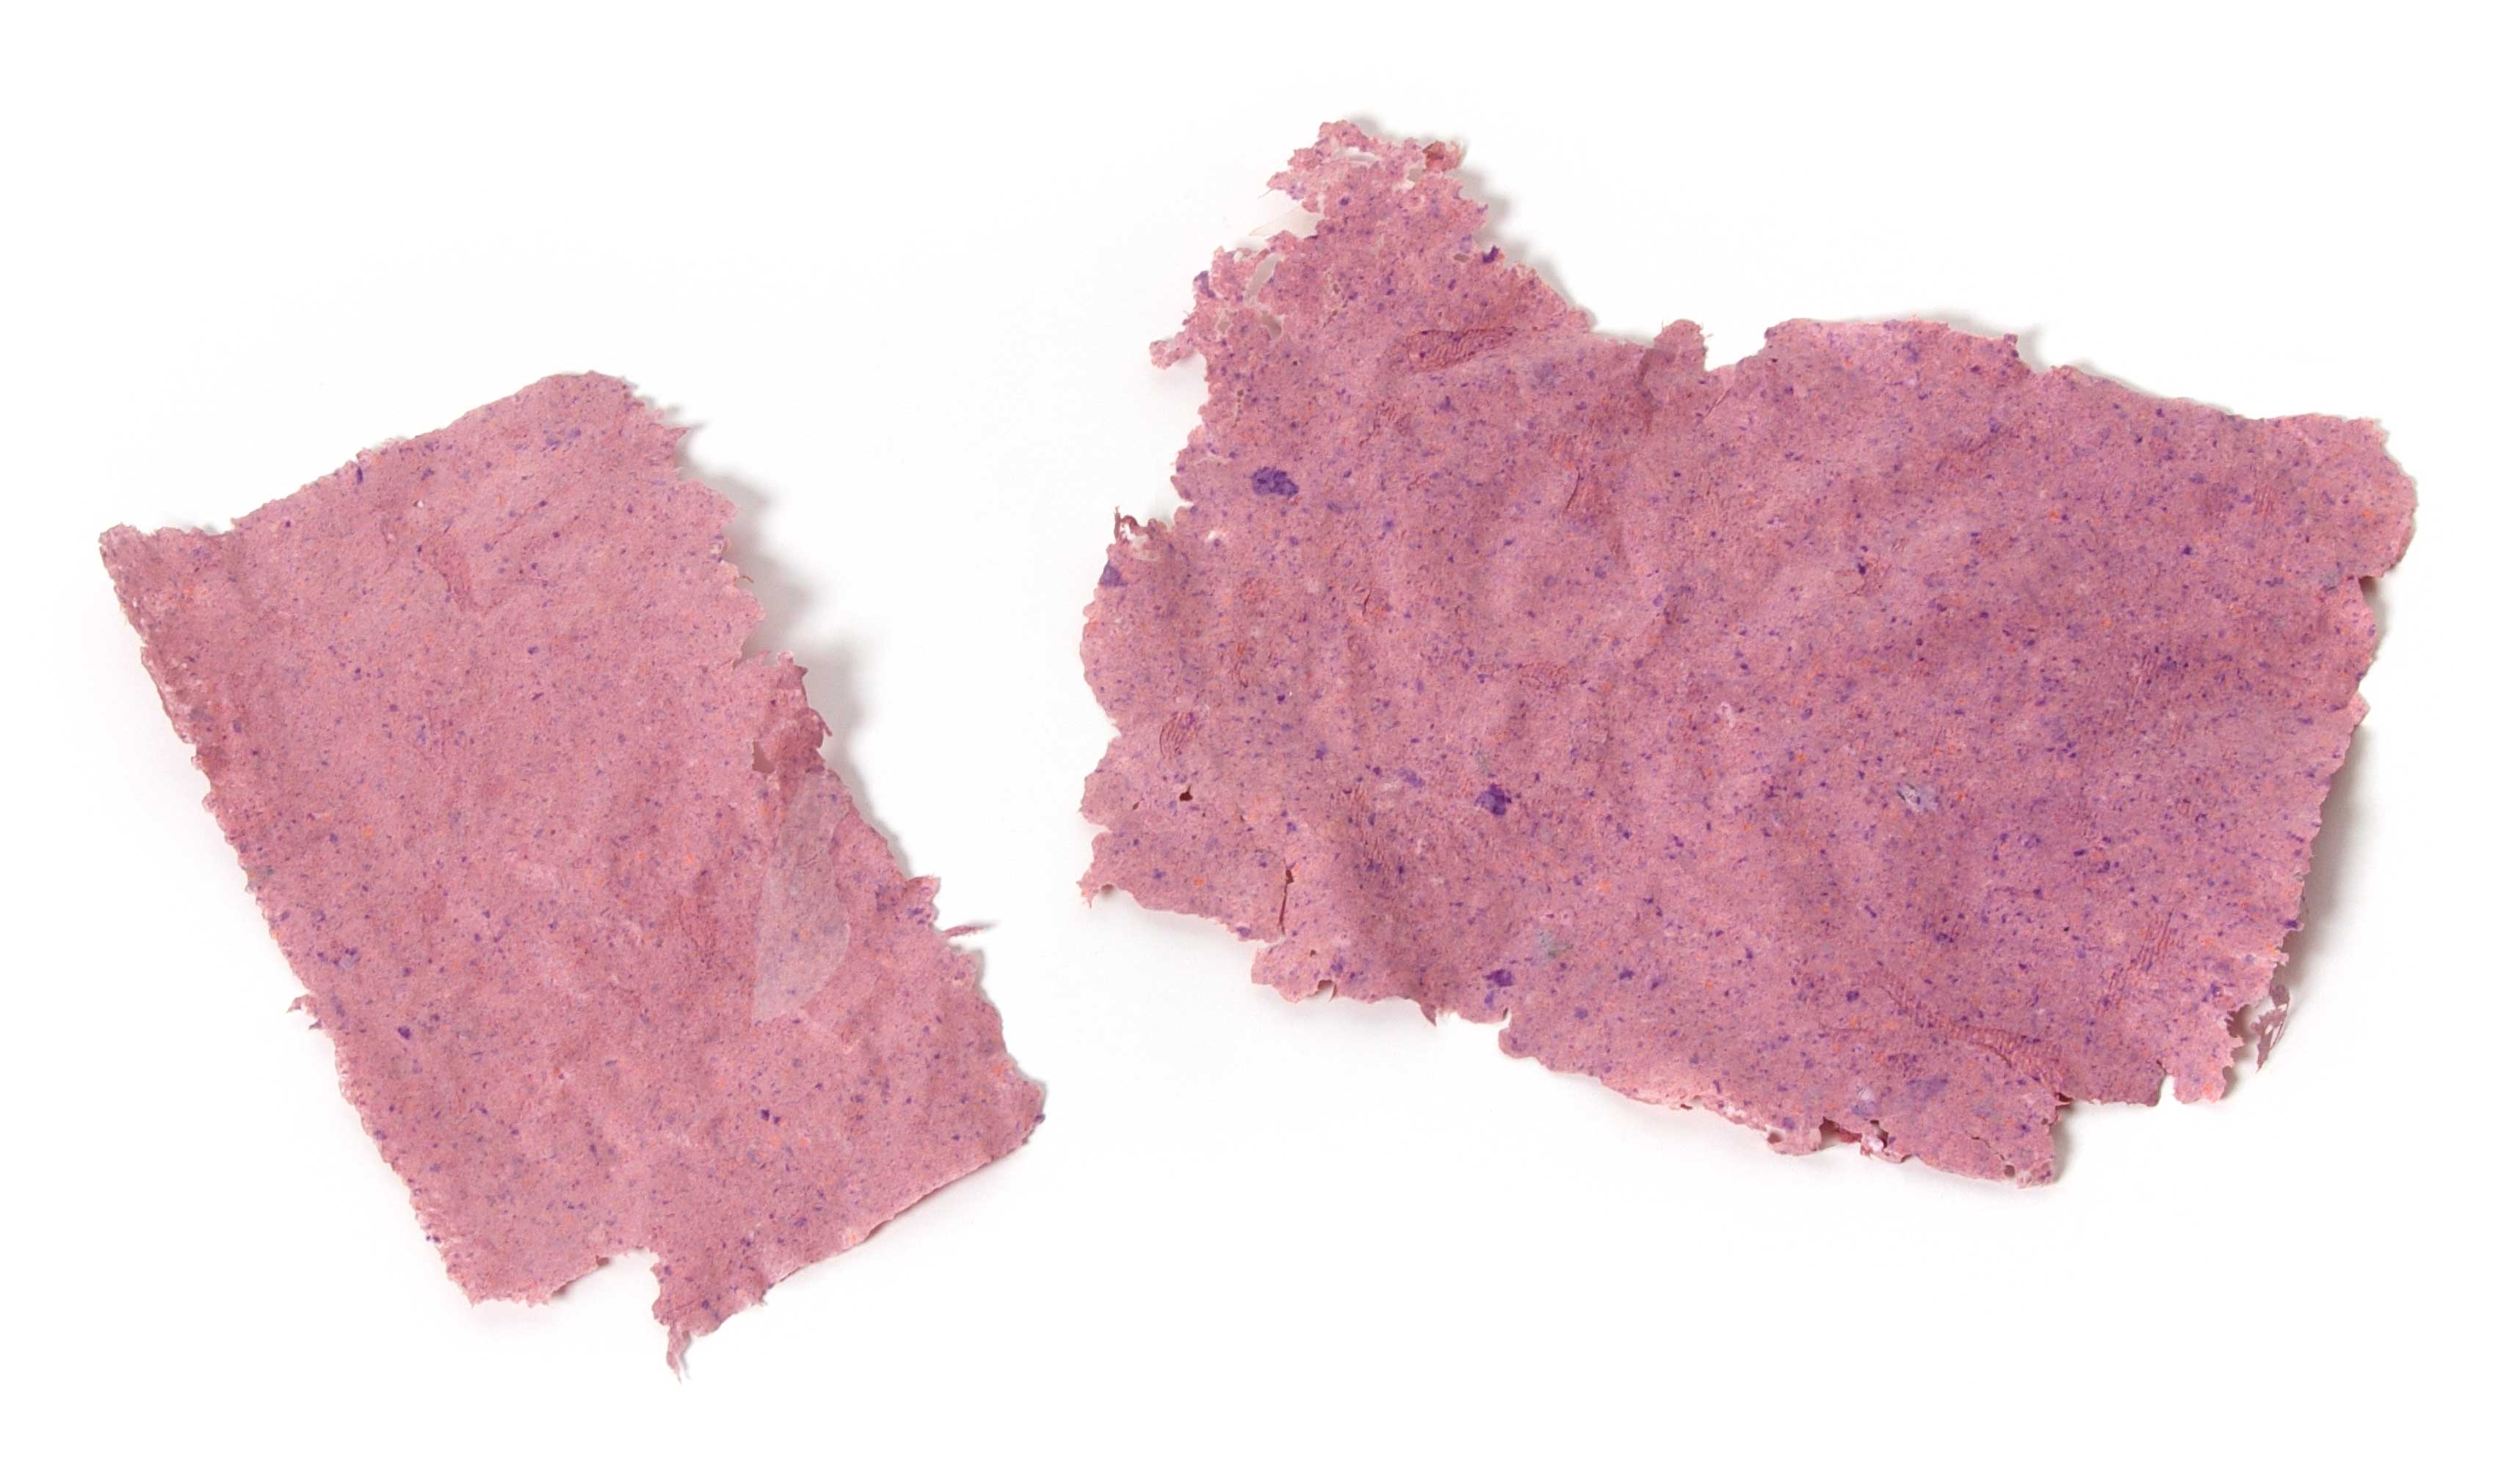
What you’ll get will be a fairly rough-surfaced, uncoated paper with a soft, open fibrous structure and a naturally deckled edge. What can you do with this now? Well, not a lot, really. Don’t try putting it through any printer unless you’ve made an uncommonly good effort and also trimmed it to fit. But as well as giving you a slight (and admittedly very crude) insight into paper making making it gives you a taste of hands-on creative craft work – and that’s something we lose touch with far too easily in this digitally-dominated world of design and production.
