Paper planes are a fun design exercise – and they’re even heading into space!
Recently, purely for my own interests and obsessions, I’ve been putting together a new iPad magazine about longboards and longboarding. That’s very exciting, but there’s something special about working directly with real, tangible, non-virtual paper. Not just by putting ink on paper, I mean working with the material directly, playing with folds and overlapping planes. From a graphic design standpoint it can be quite enlightening to explore how graphics can be broken up into segments on a flat sheet of paper, but arranged so that they come together again when the sheet is folded up into the right shape.
Most people probably think of origami at this point. It probably says something about my maturity that I first think of paper airplanes instead, but I do find them fascinating – partly because they have a specific active function.
The paper airplane design that caught my eye recently was something rather different from anything I’d seen before. ‘The Ring’ is made from a simple circular ring of paper, with one edge folded to add a little mass. Unlike most regular paper airplane designs this requires a little tape as well as the paper itself to keep it in the ring shape, but as long as you can fold paper in a straight line it really is easy to make.
Start by folding an A4 sheet in half lengthways. Crease it sharply, fold it back and crease it again, then tear it along the fold. Oh okay, use scissors if you prefer. Next, make a fold 1cm or less from one of the long edges of the paper. Fold this over again, going in the same direction, then do it another two times, pressing the folds down as you go. Next, get a tin can or a drinking glass and wrap your paper around it to curve it evenly. Press out any wrinkles in the paper, then tape the ends together. That’s it: this is read to fly. Not in quite the normal way though; it needs spin to keep it up as it moves forward. You need to ‘give it some English’, as they say in America. The effect is quite delightful: the spin makes it float for a few seconds as it slides almost horizontally through the air. This is partly because of what’s called the boundary effect, which in ultra-simple terms creates a surrounding layer of air that spins with the ring, but it also remains stable thanks to centripedal forces caused by the spin.
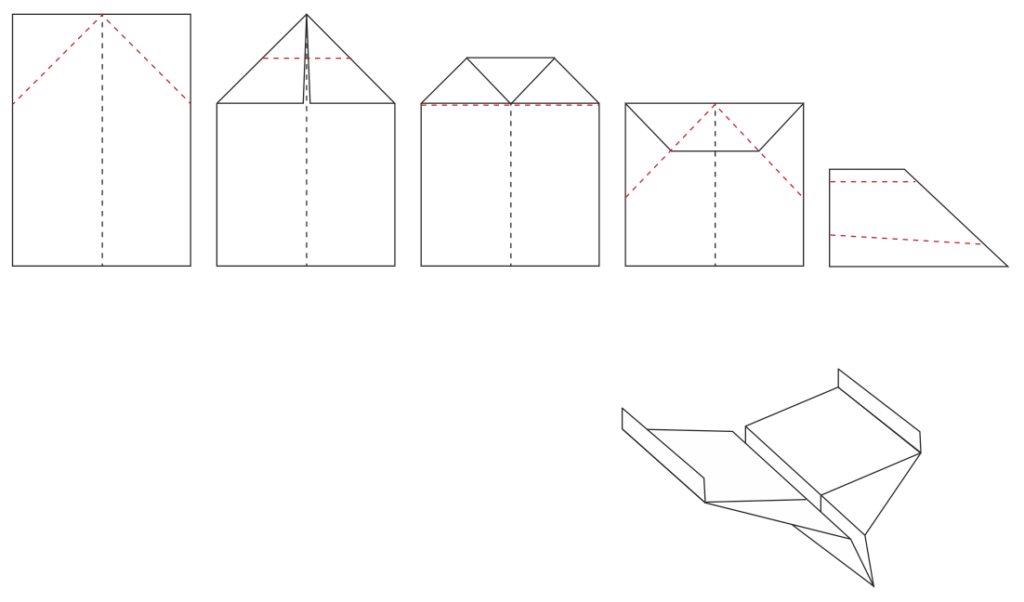
This is surprisingly fun to fly, but what I had in mind with was a more traditional kind of folded paper plane. A quick search online had already turned up an almost scary array of choices (http://bit.ly/paperplanedirectory is a great place to start), so there was nothing else for it but spend a few hours playing with paper airplanes. Honestly, it is research!

Speaking of research, how long do you think a paper airplane can stay in the air, if launched from a normal standing position? The longest paper airplane flight according to the Guinness World Records is 27.9 seconds, which is astonishingly long. If you don’t agree, see how long yours go for. Even ten seconds is incredibly good, trust me. Takuo Toda, the maker of the record-setting flight, now plans to launch similar paper planes from the space shuttle. No, seriously, he really does – and the Japanese Aerospace Exploration Agency is helping him. The idea is to explore how ultra-light materials behave and survive upper atmosphere conditions. A fringe benefit for Mr. Toda is that his paper planes would take around a week to land. That would thoroughly beat his existing record, although it wouldn’t exactly be from the requisite ‘standing height’ so it wouldn’t count.
There’s another way to make a paper airplane fly longer. It also wouldn’t qualify for a record, but it is a lot cheaper than commissioning a space flight. The ‘walkalong’ paper plane method is a cheat, in a sense, although the plane really does fly for as long as you can manage to keep it up. Simply make a paper glider that likes to fly slowly – not a pointy dart that goes at sprinting speed – and find a large rectangle of cardboard, at least a couple of feet square and preferably bigger. Fly the plane and follow behind it, holding the cardboard vertically and using it to push the air immediately behind and below your aircraft. Get this right and you’ll buoy it up as it goes forward, as if it is surfing a never-ending wave of air. Instructables.com has folding and flying info at http://bit.ly/walkalongpaperglider.
This is all good fun, but the problem with using paper airplane construction to break up a flat graphic design is that pretty much every construction involves lots of folding at one end and not much at the other. This doesn’t help slice up a graphic that much, or at least not evenly. But the ‘Paper Ninja Star’ – or paper frisbee if you prefer a less aggressive term – is another matter. It isn’t a paper plane, but it can fly fairly well if given the right flick. More importantly, in terms of breaking up graphics it scores very well.
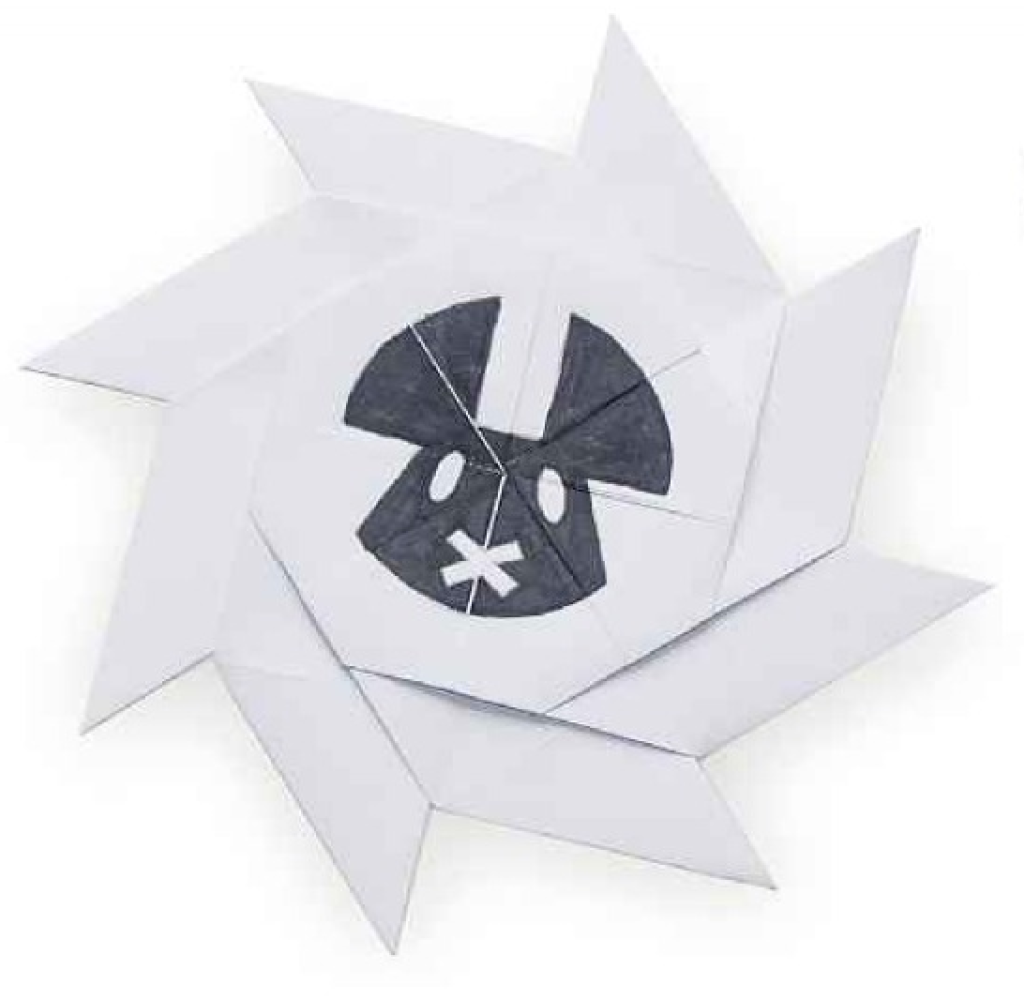
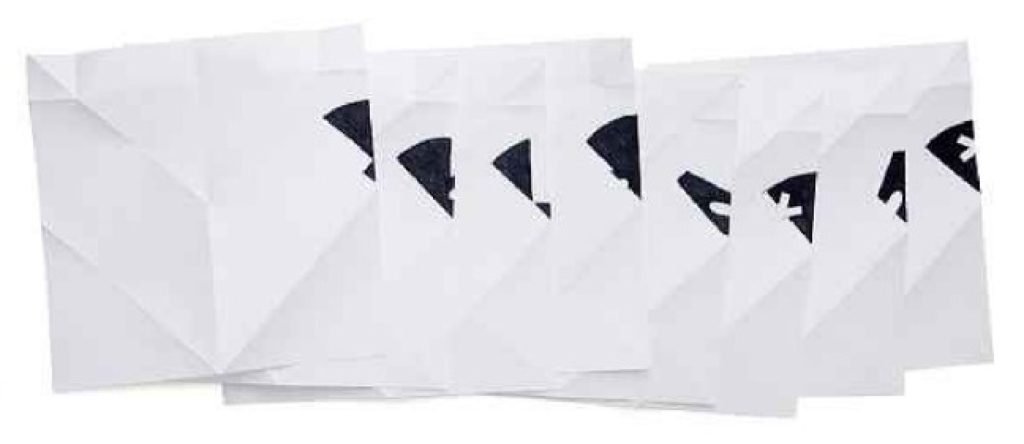
There are various different designs for the Paper Ninja Star, and the simpler four-point ones are more strictly realistic. However, the one I like best for this is the ‘Transforming Ninja Star’. This uses eight square sheets of paper, all folded the same and then fitted together. Any graphic intended to be viewed on the final assembled item would need to be cut up and shared across the eight sheets, making it rather challenging to make sense of it without putting the thing together. Better still, the different parts of the Ninja Star can slide in and out, going from a solid star shape (the shiruken) to an octagonal ring (the frisbee), and this will slide the graphic elements into different positions.
Start by making eight square sheets of paper. The simplest way is to cut the ends of some regular A4 paper. Fold each sheet in exactly the same way by following some YouTube instructions. I suggest http://bit.ly/papershiruken8b for a clear, methodical guide. Once you have your final assembled paper shuriken frisbee, sketch a design across the surface. Then take it apart again and look at the way your design is broken up. That’s how you need to make your final artwork. At this point turn to Illustrator, make a new A4 document, and plot out lines along all the fold points. Using different layers, paste your graphic into shapes that match up with the sketched parts of your sheets of paper. Print each layer separately, then try making a new paper shuriken. You’ll probably have to try more than once, but keep at it. Don’t forget to test its flight abilities too. If you’re feeling ambitious try the YouTube instructions for a 16-point paper ninja star – and tell me how it goes; I haven’t tackled that one yet.
If anyone asks you why you’re spending so much time making folding up paper and throwing the results around the room tell them it is important research into physics, material behaviour, and the deconstruction of graphics into abstracted fragments. But we both know that really it’s because it is fun.


